Hello Bar

Thursday, February 23, 2012

The Poirot Effect


This project was inspired by the opening of the British TV series Poirot. I've always thought the graphics used were very dramatic and interesting, so, I decided to try to create a similar effect using GIMP.


pult00.jpg


Some of the things you will do in this project:

  • Draw a path and make a selection from it
  • Open an image as a new layer in the current image
  • Scale a layer
  • Use guides
  • Apply a layer mask


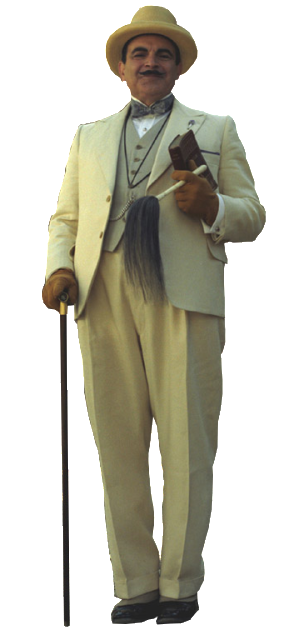
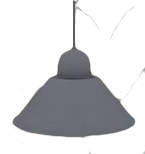
Download these source images before you begin: Poirot | OHVLamp


Create a new image 800 pixels tall by 600 pixels wide. Fill it with default black using the Bucket Fill Tool. Drag out vertical guides to 525, 310, 290, and 75 pixels. Pull down horizontal guides to 650 and 125 pixels.

pult01.jpgimg: pult01


Step 1. The light cone

Choose the Paths Tool. Draw a tall trapezoid with corners at 290, 125; 75, 675; 525, 675; and 290, 125. In the Tool Options, click on the Selection from Path button. Create a new transparent layer named Cone. Use the Bucket Fill Tool to fill the selection on the Cone layer with white. Then deselect, Select > None.

pult02.jpg


Step 2. The light fade

Add a white layer mask to the Cone layer, Layer > Mask > Add Layer Mask… . Using the Blend Tool, draw a black-to-white gradient up from the bottom of the trapezoid. You may have to experiment a few times to get the best effect. I went from 675 pixels up to 400 perpendicular to the base of the image.

ipult03.jpg


Step 3. The oval of light on the floor

Choose the Ellipse Select Tool. Draw a white oval 450 pixels wide and 95 high. Make a new transparent layer, Oval. Fill the selection on this layer with white. Deselect. Use the Move Tool to center it over the lower horizontal guide.

pult04.jpg


Step 4. Hercule

Open the Poirot image as a new layer in the image, File  > Open as Layers… . From the Layer menu, choose Scale Layer… , and scale it down to an appropriate size (I used 25%). Position this layer so that the feet are in the center of the light oval.

pult05-1.jpg


Step 5. Poirot's shadow

Add a new transparent layer, name it Shadow. With the Ellipse Select Tool, draw an oval around Poirot's feet. Fill it with black using the Bucket Fill Tool. Deselect. Select the Rotate Tool and turn it a little clockwise, about 5 degrees. You may need to adjust the position a bit with the Move Tool.

pult06.jpg


Apply a Gaussian blur with a Radius of of about 45, Filters > Blur > Gaussian Blur… . Drag the Shadow layer under the Poirot layer. Turn down the opacity to about 85%.

pult07.jpg


Step 6. The overhead lamp

Open the OHVlamp image as a new layer on top of all the other layers. Scale it down to an appropriate size (I used 30%). Position it over the top of the light cone.

pult08.jpg


Adjust the Brightness-Contrast from the Color menu, Brightness: -100, Contrast: 30.

pult09.jpg


Extension

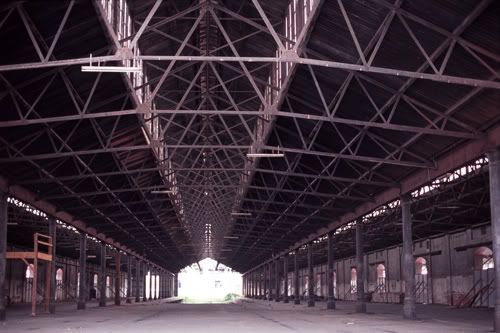
If you wish to continue, download this image:  Industrial

http://i221.photobucket.com/albums/dd67/xmath_photos/GIMP%20Blog/Poirot%20Light/Industrial.jpg


Open the Industrial image as a new layer and drag it immediately above the Background layer in the Layers pallet. Scale the Industrial layer to fill the image above the lower horizontal guide.

pult10.jpg


Set the blending Mode to Lighten Only and slide the Opacity all the way down to 13.

pult11.jpg


From the View menu hide the guides. That’s it.

pult12.jpg


Wednesday, February 8, 2012

Clipping Masks

As you are likely aware, GIMP does not include a clipping mask function like some other image editors. A clipping mask allows a background image to show through holes in the masking layer and can be very useful. I looked around a little for a how-to on getting that kind of functionality in GiMP, but those I looked at didn't allow the background image that shows through to be repositioned after the mask was created. I think the ability to move the background is important to achieving just the right result, so I set out to figure out how this could be accomplished and discovered that it isn't at all difficult.

prevw.jpg


Some skills used in this project:

Text layer

Grids and guides

Layer effects

Selecting by color

merging layers


Open the image you want to show through and name that layer Background. Create a new transparent (must be transparent, not white) layer, White, and fill it with default white using the Bucket Fill Tool.


Click on the Text Tool to make a text layer. Use a heavy, bold font in default black. I used Futura Ultra Bold Condensed.

step01.jpg


Select then merge the text layer down onto the White layer, Layer > Merge Down. Select the black text on the White layer with the Select by Color Tool.

step02.jpg


Cut out the black text, Edit > Clear, then deselect. You may want to select the Background layer and move it around a little to get a better effect.

step03.jpg


That's the basics of making a clipping mask in GIMP.  With the Layer Effects plugin, you can get some dramatic looks. Get the plugin here if you don't have it yet.


I got this look by choosing the White layer and using the Outer Glow effect with the color set to black and everything else defaults.

step04.jpg


Now, I'll show you how to use this technique to give the impression a picture has been cut into sections and each section placed on a raised panel.


Open the picture, add the transparent layer, and fill it with white as above.


Display the grid, View > Show Grid. From the rulers, I dragged out guides to divide the image in half both vertically and horizontally.

step05.jpg


Next, using the Rectangle Select Tool in "Add to the current selection mode" and the gridlines, I selected four rectangles as shown.

step06.jpg


Cut out the rectangles, Edit > Clear, and deselect. Hide the gridlines and the guides from the View menu. (You may at this point want to reposition your background picture a little bit.)

step07.jpg


Add the shadow effect from the Script-Fu menu, Script-Fu > Layer Effects > Inner Shadow… . I bumped the size and offset both up to 8.0.

step08.jpg


For a final touch, I used the Bucket Fill Tool to fill the White layer with the Wood pattern from the default Patterns pallet.

step09.jpg

Friday, January 20, 2012

Reflections

In this GIMP tutorial you will learn how to place a reflected scene in the mirrored lenses of a girl's sunglasses. This method can be adapted to inset any picture within another picture.

preview.png


Some of the things you will do in this lesson:

  • Duplicate a layer
  • Flip an image
  • Use the Fuzzy Select tool
  • Add an alpha channel
  • Scale a layer
  • Use a layer mask

You'll need two source images, one of someone wearing sunglasses (best if the subject is looking directly at the camera) and another of the scene you want to reflect in the lenses. Use images of your own or download the ones I used:

Girl in sunglasses by Tanel Teemusk | London bus by Paulo Oliveira Santos

  • Begin by opening and preparing the picture of the bus.

Crop the image to include only the essential parts of the picture which you want to appear in the reflection. The proportions of the cropped image should approximate those of the sunglasses' lenses. I cropped to a fixed aspect ratio of 1:1. Because the picture is going to be a reflection, you will need to flip the image horizontally, Image > Transform > Flip Horizontally.

GIMP-FlipBus.png

  • Now open and prepare the girl in the sunglasses.

Duplicate the Background layer, Layer > Duplicate Layer. Create a new layer, Black, filled with the foreground color, black, and drag it directly under the Background copy layer.

NewLayer.png

Working on the Background copy layer, you will now select the lens area of the glasses with the Fuzzy Select Tool in "Add to the current selection" mode.

See this in a video

Use Quick Mask (press Shift+Q to toggle Quick Mask) and a soft brush to clean up the selection if necessary.

Feather the selection by about 10 pixels, Select > Feather… . Add transparency to the layer, Layer > Transparency > Add Alpha Channel. Delete the selection, Edit > Clear. Deselect. The lenses should now appear to be filled with solid black, though what you are actually seeing is the Black layer showing through.

blackeyes.png

  • The next task is to fill each lens with the bus picture.

Select all the bus image, Select > All, and then copy it, Edit > Copy. Make the picture of the girl active and paste the copied bus picture as a new layer, Edit > Paste as > New Layer. It will appear as a new layer in the Layers pallet, name it Bus right.

blackeyes.png

Scale the picture of the bus, Layer > Scale Layer…, to be a little larger than one lens of the sunglasses. In my example, I scaled to 165x165 pixels. With the Move Tool position the bus over the right lens. Now, in the Layers pallet, drag the Bus right layer under the Background copy layer. Adjust the position of the Bus right layer to fill the right lens of the glasses.

busunder.png

Duplicate the Bus right layer, Layer > Duplicate Layer, name it Bus left. Position this layer under the Background copy layer so it fills the left lens of the glasses.

bothlenses.png

  • Now to add a bit of shadow at the bottoms of the lenses.

Select the Bus left layer and add a layer mask to it, Layer > Mask > Add Layer Mask…, initialized to White.

AddLayerMask.png

Choose the Blend Tool with a black-to-white gradient selected in the Tool options pallet. Drag a gradient up from the bottom of the Bus left layer to about 1/5 of the lens to add a bit of dark shading to the lower part of the lens. Repeat this for the right lens of the sunglasses.

final.png

That's it! You might extend the project by brightening the tops of the lenses in a manner similar to that used to darken the bottoms.