
Thursday, November 13, 2014


Monday, January 20, 2014
Thursday, December 26, 2013
Saturday, February 2, 2013
Building a Spy Movie Banner
In this GIMP project, you will learn the basics of creating a movie banner in a style that might be used for a spy movie. You will use layer blending modes, text layers, and color manipulations, as well as other skills.
Source images you can download or use your own similar images:
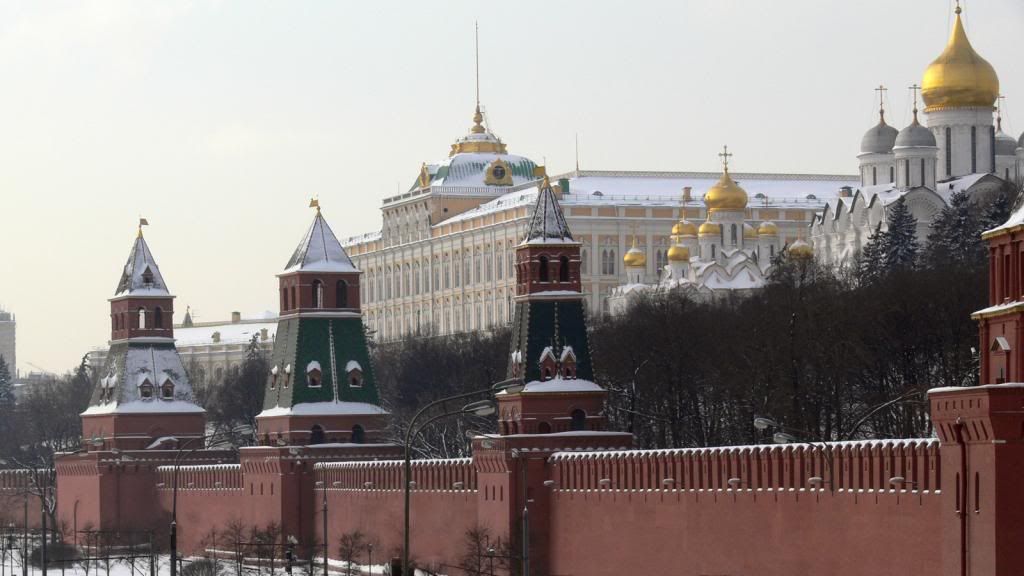
Kremlin (Original photo by Yaroslav Ushakov)
Man in Suit (Original photo by Rubén B. Todos)
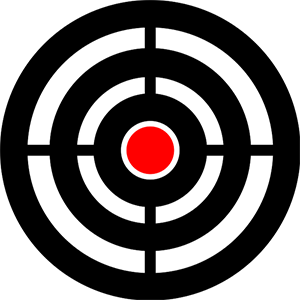
Bull’s Eye

- Part 1. The Kremlin
Apply a dark, monochromatic red, slightly blurry effect to the Kremlin image.
Open the Kremlin source image. Convert it to grayscale, Colors -Desaturate..., Choose Shade of gray based on: Luminosity.
Duplicate the layer, Layer - Duplicate Layer. Set the blending Mode of the copy layer to Multiply and slide the opacity down to 70%.
Merge these layers into one, Layer - Merge Down. Name the new layer, Kremlin.
Apply a slight Gaussian blur with a radius of 5 for both Horizontal and Vertical, Filters - Blur - Gaussian Blur... .
Now, for the dark red hue. From the Colors menu, click Colorize... . Set the Hue slider to 360, Saturation 50, Lightness -15.
You can now set this image aside for a bit.


- Part 2. The Man in the Suit
Open the Man in Suit image. With the Crop Tool, remove most of the background area. Now add transparency (an alpha channel) to the image, Layer - Transparency - Add Alpha Channel.
You need to remove the remaining white background. The Select by Color Tool will do the heavy lifting here. Click and drag in the background until all that remains is to clean up the detail around the edges of the man. Toggle on Quick Mask mode, zoom in and, with the Paintbrush Tool, clean up any remaining bits of the background, especially in the hair and inside the man's right elbow. Grow the selection by 1 px, Select - Grow. Then clear the contents of the selection, Edit - Clear. Save the image and close.
You can now reopen the Kremlin background image. Open the Man in Suit image you just worked on as a new layer, File - Open as Layers... . Be sure that in the Layers pallet it is above the Kremlin layer and name it Man.Use the Move Tool to position the Man layer to the left side of the picture and down just a bit.


- Part 3. The Text
Add the movie title and some other bits of text to the banner. Select the Text Tool. For the title choose an appropriate font and size. I used HeadlineA, 240 pt, Color white. Click in the picture and type the desired text. Position the text in a good place.
Create a selection around the text with the Select by Color Tool. Click anywhere on the white text and it will all be selected. Create a new transparent layer on top of all the others, Stroke. Reset the color swatches to the default. Apply a 4 pixel black stroke to the selection on the Stroke layer Edit - Stroke Selection... . Merge the Stroke layer down onto the text layer.
Similarly add additional text elements to the picture.


- Part 4. The Bull’s Eye
Open the Bull's Eye image as a new layer under the Spy Movie text layer. Set the blending Mode to Lighten Only. Reduce the Opacity to about 85%. Position the bull's eye where you like with the Move Tool.
You've now brought all the components together. Use this lesson as a starting point for your creative expression. Modify and experiment to your heart's delight!

Friday, January 20, 2012
Reflections
In this GIMP tutorial you will learn how to place a reflected scene in the mirrored lenses of a girl's sunglasses. This method can be adapted to inset any picture within another picture.

Some of the things you will do in this lesson:
- Duplicate a layer
- Flip an image
- Use the Fuzzy Select tool
- Add an alpha channel
- Scale a layer
- Use a layer mask
You'll need two source images, one of someone wearing sunglasses (best if the subject is looking directly at the camera) and another of the scene you want to reflect in the lenses. Use images of your own or download the ones I used:
Girl in sunglasses by Tanel Teemusk | London bus by Paulo Oliveira Santos
- Begin by opening and preparing the picture of the bus.
Crop the image to include only the essential parts of the picture which you want to appear in the reflection. The proportions of the cropped image should approximate those of the sunglasses' lenses. I cropped to a fixed aspect ratio of 1:1. Because the picture is going to be a reflection, you will need to flip the image horizontally, Image > Transform > Flip Horizontally.

- Now open and prepare the girl in the sunglasses.
Duplicate the Background layer, Layer > Duplicate Layer. Create a new layer, Black, filled with the foreground color, black, and drag it directly under the Background copy layer.

Working on the Background copy layer, you will now select the lens area of the glasses with the Fuzzy Select Tool in "Add to the current selection" mode.
Use Quick Mask (press Shift+Q to toggle Quick Mask) and a soft brush to clean up the selection if necessary.
Feather the selection by about 10 pixels, Select > Feather… . Add transparency to the layer, Layer > Transparency > Add Alpha Channel. Delete the selection, Edit > Clear. Deselect. The lenses should now appear to be filled with solid black, though what you are actually seeing is the Black layer showing through.

- The next task is to fill each lens with the bus picture.
Select all the bus image, Select > All, and then copy it, Edit > Copy. Make the picture of the girl active and paste the copied bus picture as a new layer, Edit > Paste as > New Layer. It will appear as a new layer in the Layers pallet, name it Bus right.
Scale the picture of the bus, Layer > Scale Layer…, to be a little larger than one lens of the sunglasses. In my example, I scaled to 165x165 pixels. With the Move Tool position the bus over the right lens. Now, in the Layers pallet, drag the Bus right layer under the Background copy layer. Adjust the position of the Bus right layer to fill the right lens of the glasses.

Duplicate the Bus right layer, Layer > Duplicate Layer, name it Bus left. Position this layer under the Background copy layer so it fills the left lens of the glasses.

- Now to add a bit of shadow at the bottoms of the lenses.
Select the Bus left layer and add a layer mask to it, Layer > Mask > Add Layer Mask…, initialized to White.

Choose the Blend Tool with a black-to-white gradient selected in the Tool options pallet. Drag a gradient up from the bottom of the Bus left layer to about 1/5 of the lens to add a bit of dark shading to the lower part of the lens. Repeat this for the right lens of the sunglasses.


That's it! You might extend the project by brightening the tops of the lenses in a manner similar to that used to darken the bottoms.
Sunday, August 15, 2010
The Catch
Before

After

Some of the things you’ll do in this project ...
- Use a guide
- Adjust shapes with the Perspective tool
- Clear the contents of a selection
- Feather, shrink, and invert selections
- Hide a layer
- Use the Eraser tool
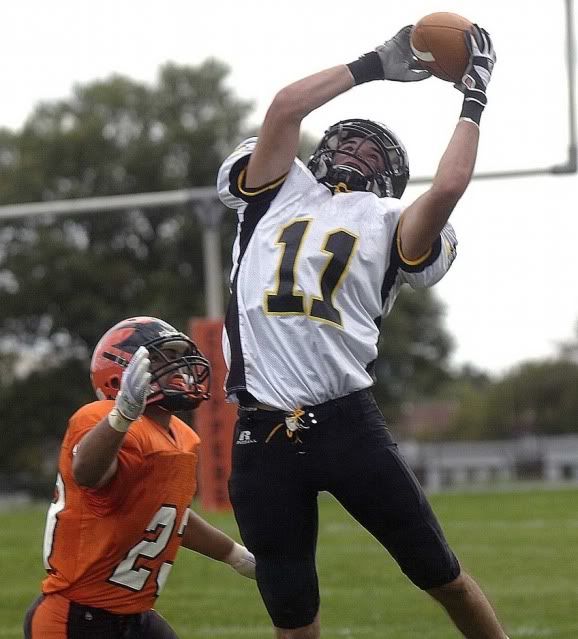
1. First, drag a guide down from the top ruler to define the location of the top of the "frame".

2. Now, the tedious part. Select the portion of the football player above the guide (which will be outside of the "frame") and a small portion below the guide. I used the Extraction tool and refined the selection using a Quick Mask. The details of making this selection are not within the scope of this lesson.

3. Choose the Rectangle Select tool and click on the "Add to selection" mode icon.

Select the entire region between the guide and the bottom of the image, invert the selection, and feather it 3 pixels.

4. Create a new layer named "black" and fill the whole selection with default black using the Bucket tool.

In the next step, you'll define the "picture frame."
5. With the Rectangle Select tool in Normal mode, select the entire region below the guide again. Use the Perspective tool (be certain to choose the modify selection icon), to reshape the selection into a trapezoid.
 See how to do this in a short video
 6. Invert this selection. Use the Pencil tool to paint the areas to the left of, right of, and below the "frame" default black.

7. Create a new layer, "white." Fill the trapezoidal selection with default white.

8. Shrink the selection by 35 pixels. Using the Perspective tool again, adjust this trapezoid to give the appearance that the the top border of the "frame" is farther from you than the bottom edge.
9. Clear the white fill from the inner selection, Edit > Clear.

All that remains is to delete the part of the white "frame" that covers the leaping player.
10. Hide the "white" layer (click the "eye" in the Layers palette). Use the Lasso tool to select the portion of the football player which is under the border (be generous). Be sure to accurately select the left and right edges of the player. Feather the selection by 3 pixels. I chose to do this in pieces, but you could do it all at once.

11. Make the "white" layer visible again (be sure it's the active layer). Use the Eraser tool to remove the selected area of the white border from over the player.
That's it!

Dolphins and whales are great subjects for this effect. I think you could do some nice things with basketball players and soccer goalies, too. Have fun!