In this three-part tutorial you'll learn how to use GIMP to create a realistic looking adhesive bandage.

Some of the things you will do in this exercise:
- Change layer mode
- Merge layers
- Open an image as a new layer
- Crop a layer to a selection
- Apply layer effects*
PART 1Create the main body of the bandage.
Before beginning, in the Preferences panel (Edit > Preferences), set the default grid spacing to 20 pixels.

Create a new file, File > New... 800x400, and display the grid, View > Show Grid.

From the left ruler, drag out vertical guides to 60 and 740 pixels. From the top, drag down horizontal guides to 240 and 100 pixels.
Rectangle Select Tool select a rectangle about 680 x 140 pixels bounded by the guides. With the Ellipse Select Tool in "Add to the current selection mode" add curves to the ends of the rectangular selection.


See a video showing how to do this
Add a new transparent layer, Main. Set the FG color to something like a flesh tone, I used f4cc85, and fill the selection on the Main layer using the Bucket Fill Tool.

Add a new transparent layer, Main Shadow, reset the default colors, and fill the selection on this layer with black. Remove the selection. Blur this layer, Filters > Blur > Gaussian Blur…‚ with a Blur Radius of 20. In the Layers pallet drag the Main Shadow layer under the Main layer. With the Move Tool, reposition this layer down and to the right for a shadow effect. Turn the opacity down to about 50.

PART 2Make the pad portion of the bandage.
Using the Move Tool, drag the vertical guides to 280 and 520 pixels. Drag the horizontal guides to 110 and 230 pixels.

Choose the Rectangle Select Tool and in the tool settings check Rounded corners with a radius of 10. Now using the guides make the selection for the pad.

Make a new layer, Pad, on top of all the other layers. Choose a slightly lighter flesh tone to fill the selection on the Pad layer. I used f5d39b.
Next, give the pad area a raised effect using Script-Fu > Layer Effects > Bevel and Emboss…‚ set the Shadow Color to a darker flesh tone, my choice was c2a77b, and keep the other default settings.
Remove the selection. Merge the Pad-highlight and Pad-shadow layers and apply a Gaussian Blur with radius 5.

PART 3Apply the perforations.
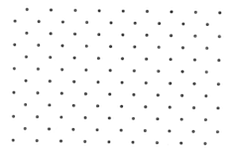
You will need to download this image of dots on a transparent background or find one of your own.
Move your vertical guides to 60 and 260 and use them to make a rectangular selection on the left end of the bandage.

Open the downloaded file wpolka-dots.png as a new layer, File > Open as Layers… . Position the dots layer to fill the rectangular selection. Then crop the layer to the selection, Layer > Crop to Selection. (NOTE: Moving the dots layers can be a little tricky as you have to precisely grab one of the dots in the image.)

Duplicate this layer and drag the copy to the right end of the bandage. Next, select a rectangle that covers the pad area and again open the wpolka-dots.png as a new layer, position it, and crop it to the selection as done earlier.

Remove all selections and drag off all the guides. Merge all the polka dot layers into a single layer.

Be sure that's the active layer. Change the Layer Mode to Grain Extract.

And you should be right here ...

*If you do not have the Layer Effects plug-in installed, go here.
How many times you'll ever need to create an adhesive bandage from scratch, I can't guess. However, I hope is that you learned a few new skills and how to apply them in other image work.