Hello Bar

Showing posts with label layer effects. Show all posts

Saturday, December 22, 2012

Stick a Label on It

In this GIMP tutorial you will create an effect that appears similar to a strip of embossed tape as produced by some label makers.
 
 
Some of the things used in this project:
  • Layer Effects-Drop Shadow
  • Layer Effects-Bevel and Emboss
  • Path Tool
  • Merging layers
  • Selection by color
  • Text Tool
 
Note: To complete this tutorial, you will need to have the Script-Fu Layer Effects plugin installed. Get it here if you don't have it yet.

Create a new image 800 pixels wide by 250 pixels, File - New... . Set the foreground color to a medium gray (8b8b8b), then fill the image, Edit - Fill with FG Color.

With the Rectangle Select Tool, make a selection about 500 pixels by 100 pixels.


Make a new transparent layer, Layer - New Layer..., named Strip. Reset the color swatches to the default colors. Fill the selection on the Strip layer with the foreground color (black).


The next step is to add a white drop shadow to the strip. Script Fu - Layer Effects... - Drop Shadow... . Set the Color to white and the Size and Offset Distance each to 2.0.
 
Deselect, Select - None. Make the Strip layer active and merge it with the Script-dropshadow layer, Layer - Merge Down.
 
 
Click the Text Tool in the Toolbox. In the Tool Options, I used Monospace, 64, white. Click in the black strip and type a line of text.  With the Move Tool, position the text in the center of the black strip.

 
Use the Select by Color Tool and click anywhere in the text to select the white text. Apply the embossing effect, Script-Fu - Layer Effects - Bevel and Emboss… with the settings shown below.


Deselect. In the Layers pallet, select the upper of the two new layers created in the emboss process and merge it down to the lower layer. To the resulting layer, apply a slight blur, Filters - Blur - Blur.
 
 
Get an even more authentic effect by 'folding down' a corner. 
 
Make the Strip-dropshadow layer active. With the Paths Tool (in Design mode), draw a triangle in the upper left corner of the black strip. In the Tool Options dialog, click the Selection from Path button. Delete the selected area, Edit - Clear.
 
 
Deselect everything. From the Paths pallet, delete the path you drew.

Make a new transparent layer, Fold over. Use the Paths Tool again to draw a triangle to represent the folded corner. Convert it to a selection.
 
 
Fill the triangle with white, Edit - Fill with BG Color. Deselect, and delete the path.
 
 
Note: The Bevel and Emboss settings were determined after a lot of experimentation. You might improve the effect by further refining these settings.

Wednesday, February 8, 2012

Clipping Masks

As you are likely aware, GIMP does not include a clipping mask function like some other image editors. A clipping mask allows a background image to show through holes in the masking layer and can be very useful. I looked around a little for a how-to on getting that kind of functionality in GiMP, but those I looked at didn't allow the background image that shows through to be repositioned after the mask was created. I think the ability to move the background is important to achieving just the right result, so I set out to figure out how this could be accomplished and discovered that it isn't at all difficult.

prevw.jpg


Some skills used in this project:

Text layer

Grids and guides

Layer effects

Selecting by color

merging layers


Open the image you want to show through and name that layer Background. Create a new transparent (must be transparent, not white) layer, White, and fill it with default white using the Bucket Fill Tool.


Click on the Text Tool to make a text layer. Use a heavy, bold font in default black. I used Futura Ultra Bold Condensed.

step01.jpg


Select then merge the text layer down onto the White layer, Layer > Merge Down. Select the black text on the White layer with the Select by Color Tool.

step02.jpg


Cut out the black text, Edit > Clear, then deselect. You may want to select the Background layer and move it around a little to get a better effect.

step03.jpg


That's the basics of making a clipping mask in GIMP.  With the Layer Effects plugin, you can get some dramatic looks. Get the plugin here if you don't have it yet.


I got this look by choosing the White layer and using the Outer Glow effect with the color set to black and everything else defaults.

step04.jpg


Now, I'll show you how to use this technique to give the impression a picture has been cut into sections and each section placed on a raised panel.


Open the picture, add the transparent layer, and fill it with white as above.


Display the grid, View > Show Grid. From the rulers, I dragged out guides to divide the image in half both vertically and horizontally.

step05.jpg


Next, using the Rectangle Select Tool in "Add to the current selection mode" and the gridlines, I selected four rectangles as shown.

step06.jpg


Cut out the rectangles, Edit > Clear, and deselect. Hide the gridlines and the guides from the View menu. (You may at this point want to reposition your background picture a little bit.)

step07.jpg


Add the shadow effect from the Script-Fu menu, Script-Fu > Layer Effects > Inner Shadow… . I bumped the size and offset both up to 8.0.

step08.jpg


For a final touch, I used the Bucket Fill Tool to fill the White layer with the Wood pattern from the default Patterns pallet.

step09.jpg

Sunday, May 29, 2011

Stick It To Me: Create an adhesive bandage from scratch

In this three-part tutorial you'll learn how to use GIMP to create a realistic looking adhesive bandage.

band-aid-tut-sml.jpg

Some of the things you will do in this exercise:

  • Change layer mode
  • Merge layers
  • Open an image as a new layer
  • Crop a layer to a selection
  • Apply layer effects*

PART 1Create the main body of the bandage.

Before beginning, in the Preferences panel (Edit > Preferences), set the default grid spacing to 20 pixels.

ba01.png

Create a new file, File > New... 800x400, and display the grid, View > Show Grid.

ba02.png

From the left ruler, drag out vertical guides to 60 and 740 pixels. From the top, drag down horizontal guides to 240 and 100 pixels.

Rectangle Select Tool select a rectangle about 680 x 140 pixels bounded by the guides. With the Ellipse Select Tool in "Add to the current selection mode" add curves to the ends of the rectangular selection.

ba03.png

mmenuvideooff.gif

See a video showing how to do this


Add a new transparent layer, Main. Set the FG color to something like a flesh tone, I used f4cc85, and fill the selection on the Main layer using the Bucket Fill Tool.

ba04.png

Add a new transparent layer, Main Shadow, reset the default colors, and fill the selection on this layer with black. Remove the selection. Blur this layer, Filters > Blur > Gaussian Blur…‚ with a Blur Radius of 20. In the Layers pallet drag the Main Shadow layer under the Main layer. With the Move Tool, reposition this layer down and to the right for a shadow effect. Turn the opacity down to about 50.

ba05.png


PART 2Make the pad portion of the bandage.

Using the Move Tool, drag the vertical guides to 280 and 520 pixels. Drag the horizontal guides to 110 and 230 pixels.

ba06.png

Choose the Rectangle Select Tool and in the tool settings check Rounded corners with a radius of 10. Now using the guides make the selection for the pad.

ba07.png

Make a new layer, Pad, on top of all the other layers. Choose a slightly lighter flesh tone to fill the selection on the Pad layer. I used f5d39b.

Next, give the pad area a raised effect using Script-Fu > Layer Effects > Bevel and Emboss…‚ set the Shadow Color to a darker flesh tone, my choice was c2a77b, and keep the other default settings.

Remove the selection. Merge the Pad-highlight and Pad-shadow layers and apply a Gaussian Blur with radius 5.

ba08.png


PART 3Apply the perforations.

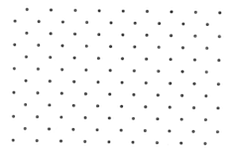
You will need to download this image of dots on a transparent background or find one of your own.

Move your vertical guides to 60 and 260 and use them to make a rectangular selection on the left end of the bandage.

ba10.png

Open the downloaded file wpolka-dots.png as a new layer, File > Open as Layers… . Position the dots layer to fill the rectangular selection. Then crop the layer to the selection, Layer > Crop to Selection. (NOTE: Moving the dots layers can be a little tricky as you have to precisely grab one of the dots in the image.)

ba11.png

Duplicate this layer and drag the copy to the right end of the bandage. Next, select a rectangle that covers the pad area and again open the wpolka-dots.png as a new layer, position it, and crop it to the selection as done earlier.

ba12.png

Remove all selections and  drag off all the guides. Merge all the polka dot layers into a single layer.

ba13.png

Be sure that's the active layer. Change the Layer Mode to Grain Extract.

ba14.png

And you should be right here ...

band-aid-tut.jpg

*If you do not have the Layer Effects plug-in installed, go here.

How many times you'll ever need to create an adhesive bandage from scratch, I can't guess. However, I hope is that you learned a few new skills and how to apply them in other image work.

Tuesday, January 11, 2011

Quick and Easy Zoom Effect

In this tutorial you’ll create the effect of having zoomed in on a portion of a screenshot to emphasize something in that area.

This lesson was inspired by Jessica Cam Wong's very good tutorial on this effect. In this exercise your product may be be less elegant, but you'll achieve what I believe is a satisfactory and pleasing result a bit more easily and quickly.

A portion of this procedure includes using the GIMP Layer Effects plugin. If you don't have the Layer Effects plugin installed, you can get it here at the GIMP Plugin Registry.

Some of the skills you will use in this exercise:
  • Create a new layer from a pasted selection
  • Expand a new layer to the size of the image
  • Resize (scale) a layer
  • Create a selection using Alpha to Selection
  • Grow a selection
  • Apply the Drop Shadow filter
  • Hide, merge, and reveal layers
You will, of course, need a screenshot on which to work. You can capture a screenshot in GIMP using File > Create > Screenshot… . Capture an approximately 700-800 pixel square screenshot using whatever method you prefer.

Begin by using the Ellipse Select tool to define the "zoomed in" area.

Then copy and immediately paste this selection (Ctrl+C, Ctrl+V). It looks as though nothing has happened, but in the Layers pallet you should notice a "Floating Selection".

Create a new layer (Layer > New Layer…) which will turn this floating selection into a new layer, name it Zoom. Expand this layer to the full image size, Layer > Layer to Image Size.

In the Layers pallet, select the Background layer. Scale this layer down to the desired size, Layer > Scale Layer… . I made the Background layer 400 pixels wide.

Position the Zoom layer over the Background layer as desired.

Right-click the Zoom layer in the Layer pallet and select Alpha to Selection. This creates a selection from the zoomed in area.


Grow the selection by 2 pixels, Select > Grow… .

Create a new layer, Border, and use the Bucket Fill tool to fill the selection on the Border layer with black, the foreground color.


In the Layers pallet drag the Border layer below the Zoom layer.


Apply the Inner Shadow script from the Layer Effects plugin, Script-Fu > Layer Effects > Inner Shadow… with the default settings. You can skip this step and still get a fairly nice effect if you don't want to install the plugin.


Remove the current selection, Ctrl+Shft+A. Now apply a Drop Shadow to the Zoom layer, Filters > Light and Shadow > Drop Shadow… . Use the default settings.

The next step is to merge the Drop Shadow, Border, and Zoom layers. In the Layers pallet, click the eye icon for the Background layer to hide it temporarily. Right-click any of the visible layers and select Merge Visible Layers…, then click the Merge button.

Make the Background layer visible again (click where the eye should be) and select that layer.

From here, I'm going to present two different ways to finish this effect.


Background Blur
Blur the Background layer just a bit, Filters > Blur > Gaussian Blur… , set the Blur Radius at 2 for both Horizontal and Vertical.


Background Dim
Create a new layer, named Dim, in the Foreground Color (black). Set the Dim layer's opacity to about 25%.

Finally, crop out the transparent region around the perimeter, flatten the image, and save it as a JPG or PNG for web use.

Experiment with different settings, filters, and colors to get an effect you like. As always, I’ve tried to use one or two less familiar tools or techniques. Hope you learned something and are inspired to try something new.