Monday, February 2, 2015


Tuesday, June 24, 2014
Thursday, April 10, 2014
Wednesday, November 28, 2012
Happy Holidays!!! A Text Project
In this GIMP project, you will use layers, strokes, and several other techniques to create a festive holiday text effect.


Select the upper of the two ribbon layers and merge them together, Layer > Merge Down.


Friday, September 21, 2012
Ghost in the Forest
By following the steps in this GIMP project you will see how to use layer blending modes and a variety of tools to create the effect of a ghost appearing in the forest.
Some of the concepts used in this project:

- Adding an alpha channel
- Desaturating an image
- Cropping to a fixed aspect ratio
- Using the Fuzzy select tool
- Opening an image as a new layer
- Using Layer masks
- Using Layer modes
- Selecting using transparency (Alpha to selection)
- Stroking a selection
I used this image of a lady from stock.xchng as the basis for the ghost. The first step is to eliminate all the white background around the lady and replace it with transparency. Begin by using the Crop Tool to eliminate most of the background area.
Add transparency to the image, Layer > Transparency > Add Alpha Channel. Pick the Fuzzy Select Tool and click and drag forward in the background. This will select most of the white background without selecting anything within the lady herself. (You might want to use Quick Mask mode to be certain that no part of the lady is selected and to clean up your selection if necessary.)
Feather the selection about 5 pixels, Select > Feather... . Clear the selection, Edit > Clear.
Deselect, Select > None. Zoom in on the lady and use the Eraser Tool to manually clean up any remains of the white background around the edges of the lady.
Convert the lady to a black-and-white image, Colors > Desaturate... with Luminosity selected in the dialog. Select Brightness-Contrast... in the Colors menu. Slide the Brightness down to about -50 and the Saturation up to about 30 to give the image a darker appearance.
Now, fade out the lower part of her body. Add a white layer mask, Layer > Mask > Add Layer Mask... . With the Blend Tool, drag a FG-to-BG gradient (default colors) vertically from the bottom of the image to about the level of her waist.
Finally, scale the image to a height of about 850 pixels, Image > Scale Image... . Save and close the image of the lady.
Moving on to the forest image. As the source for the forest, I used this image, also from stock.xchng. The first step is to crop out a portion of the image with the Crop Tool, in the Tool Options, select Fixed Aspect Ratio of 5:8.
Resize the resulting image to a height of 1200 pixels, Image > Scale Image... .


Open the previously saved image of the ghost lady as a new layer in the forest image, File > Open as Layers... . Make sure the image and not the mask is active in the ghost lady layer. Use the Move Tool to position the lady where you like. Set the Layer Mode to Overlay in the Layers pallet. Reduce the Opacity to about 60%.

Duplicate the ghost lady layer, Layer > Duplicate Layer. Set the Layer Mode to Grain Merge and reduce the Opacity to about 25%. Apply a Gaussian blur with a Radius of 10 to the ghost lady copy layer, Filters > Blur > Gaussian Blur....

Add a soft glow around the ghost. Again, open the saved image of the ghost lady as a new layer. Rename this layer as glow. Delete the layer mask, Layer > Mask > Delete Layer Mask. Temporarily hide all the other layers by clicking the “eye” icon for each.

Now, to paint a white border around the lady. Select the image of the lady, Layer > Transparency > Alpha to Selection. Swap the default colors. Now stroke the selection, Edit > Stroke Selection..., Line width: 10 px. Clear the selection. Deselect.

Apply a Gaussian blur of 20 px. Unhide the other layers and use the Move Tool to position the glow layer around the ghost.

Swap the default colors back to black FG and white BG. Add a mask to this layer and fade it exactly as you did to the ghost lady layer earlier.

Experiment with various settings as you try out this lesson. Changing just a few things can dramatically affect the results you get. I hope you have fun playing around with this project.

Saturday, April 14, 2012
Through a Keyhole
In this GIMP project, you will learn how to use layers, selection tools, the stroke dialog, and filters in creating the effect of looking through a keyhole.

Start by creating a new image 600 pixels wide by 800 pixels high. Open the image that you want to appear through the keyhole as a new layer, File > Open as Layers… . Note: It may be necessary to scale and/or reposition this image to get the best effect.

- Making the keyhole.
Create a new layer, brass, on top. With the Bucket Fill Tool, fill it with a brass-like color. I used #8a4500.

Set gridlines every 25 px in the Preferences panel, Edit > Preferences. In the View menu, turn on Show Grid (the box is checked).
Using the Paths Tool, draw a tall, narrow trapezoid, as shown below, to be the lower part of the keyhole. Suggestion: Dragging out guides can make the selections easier.

Now, in the Tool Options click the Selection from Path button to turn the path into a "marching ants" selection.

With the Ellipse Select Tool (in Add to the current selection mode) draw a circle to be the top portion of the keyhole as shown below.

Be sure brass is the active layer. Clear the contents of the keyhole-shaped selection, Edit > Clear. In the View menu, turn of the grid and guides.

- Putting a slight edge around the keyhole.
Create a new layer named edge on top. Make sure edge is the active layer and stroke the selection, Edit > Stroke Selection…, click the radio button for Stroke with a paint tool, and choose Paintbrush from the drop-down menu. In the Tools pallet, select a paintbrush of about 3 pixels. Set the color to a very dark brown (#532a00). Finally, in the Stroke Selection dialog, click Stroke.

- Put a little bit of shadow inside the edges of the keyhole.
Make a new layer on top, inside shadow. Using Stroke Selection again, chose the Stroke line style, a width of about 15 px, and solid default black, click Stroke. Then, remove the selection, Select > None.

Apply a Gaussian blur with a radius of about 35, Filters > Blur > Gaussian blur… . Drag the inside shadow layer immediately under the brass layer. Decrease the opacity to about 75-80%.

- Add some shadow through the keyhole.
Create a new layer above the inside layer, name it gradient, and fill it with black using the Bucket Fill Tool. Add a layer mask to the gradient layer, right-click the layer in the Layers pallet and select Add Layer Mask… .

Select the Blend Tool and choose a black-to-white radial gradient. Drag the Blend Tool vertically downwards in the lower portion of the keyhole to reveal the inside layer. You may have to experiment a few times to get a good result. Decrease the opacity to about 75%.

As they say in Montreal, “Voila!” There are numerous opportunities for modifications and variations in this project, so be bold and have fun!
Thursday, February 23, 2012
The Poirot Effect
This project was inspired by the opening of the British TV series Poirot. I've always thought the graphics used were very dramatic and interesting, so, I decided to try to create a similar effect using GIMP.

Some of the things you will do in this project:
- Draw a path and make a selection from it
- Open an image as a new layer in the current image
- Scale a layer
- Use guides
- Apply a layer mask
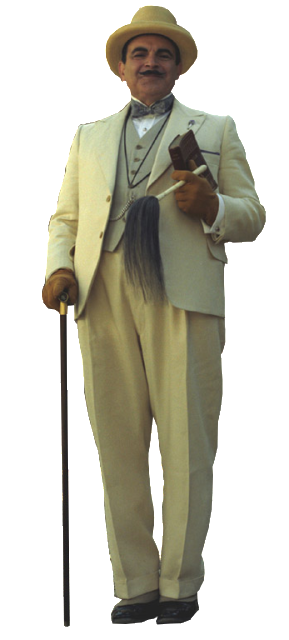
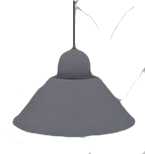
Download these source images before you begin: Poirot | OHVLamp
Create a new image 800 pixels tall by 600 pixels wide. Fill it with default black using the Bucket Fill Tool. Drag out vertical guides to 525, 310, 290, and 75 pixels. Pull down horizontal guides to 650 and 125 pixels.

Step 1. The light cone
Choose the Paths Tool. Draw a tall trapezoid with corners at 290, 125; 75, 675; 525, 675; and 290, 125. In the Tool Options, click on the Selection from Path button. Create a new transparent layer named Cone. Use the Bucket Fill Tool to fill the selection on the Cone layer with white. Then deselect, Select > None.

Step 2. The light fade
Add a white layer mask to the Cone layer, Layer > Mask > Add Layer Mask… . Using the Blend Tool, draw a black-to-white gradient up from the bottom of the trapezoid. You may have to experiment a few times to get the best effect. I went from 675 pixels up to 400 perpendicular to the base of the image.
i

Step 3. The oval of light on the floor
Choose the Ellipse Select Tool. Draw a white oval 450 pixels wide and 95 high. Make a new transparent layer, Oval. Fill the selection on this layer with white. Deselect. Use the Move Tool to center it over the lower horizontal guide.

Step 4. Hercule
Open the Poirot image as a new layer in the image, File > Open as Layers… . From the Layer menu, choose Scale Layer… , and scale it down to an appropriate size (I used 25%). Position this layer so that the feet are in the center of the light oval.

Step 5. Poirot's shadow
Add a new transparent layer, name it Shadow. With the Ellipse Select Tool, draw an oval around Poirot's feet. Fill it with black using the Bucket Fill Tool. Deselect. Select the Rotate Tool and turn it a little clockwise, about 5 degrees. You may need to adjust the position a bit with the Move Tool.

Apply a Gaussian blur with a Radius of of about 45, Filters > Blur > Gaussian Blur… . Drag the Shadow layer under the Poirot layer. Turn down the opacity to about 85%.

Step 6. The overhead lamp
Open the OHVlamp image as a new layer on top of all the other layers. Scale it down to an appropriate size (I used 30%). Position it over the top of the light cone.

Adjust the Brightness-Contrast from the Color menu, Brightness: -100, Contrast: 30.

Extension
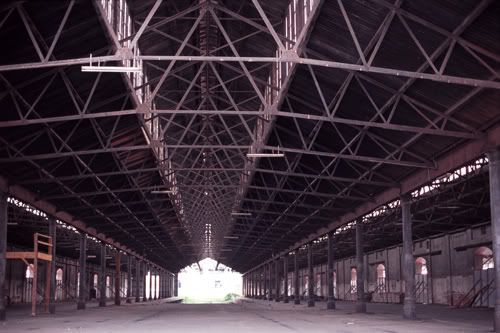
If you wish to continue, download this image: Industrial
http://i221.photobucket.com/albums/dd67/xmath_photos/GIMP%20Blog/Poirot%20Light/Industrial.jpg
Open the Industrial image as a new layer and drag it immediately above the Background layer in the Layers pallet. Scale the Industrial layer to fill the image above the lower horizontal guide.

Set the blending Mode to Lighten Only and slide the Opacity all the way down to 13.

From the View menu hide the guides. That’s it.