In this easy lesson, you will learn how to create an image which appears to show the same person appearing in multiple locations in a scene.

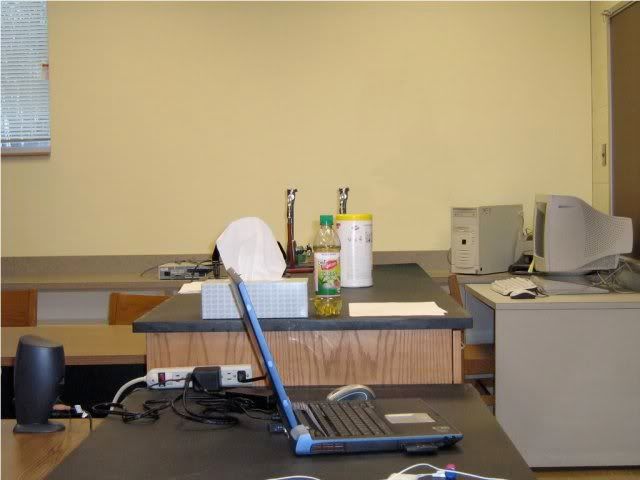
Ideally you would begin with a photo of the scene without the person in it to use as the background image.

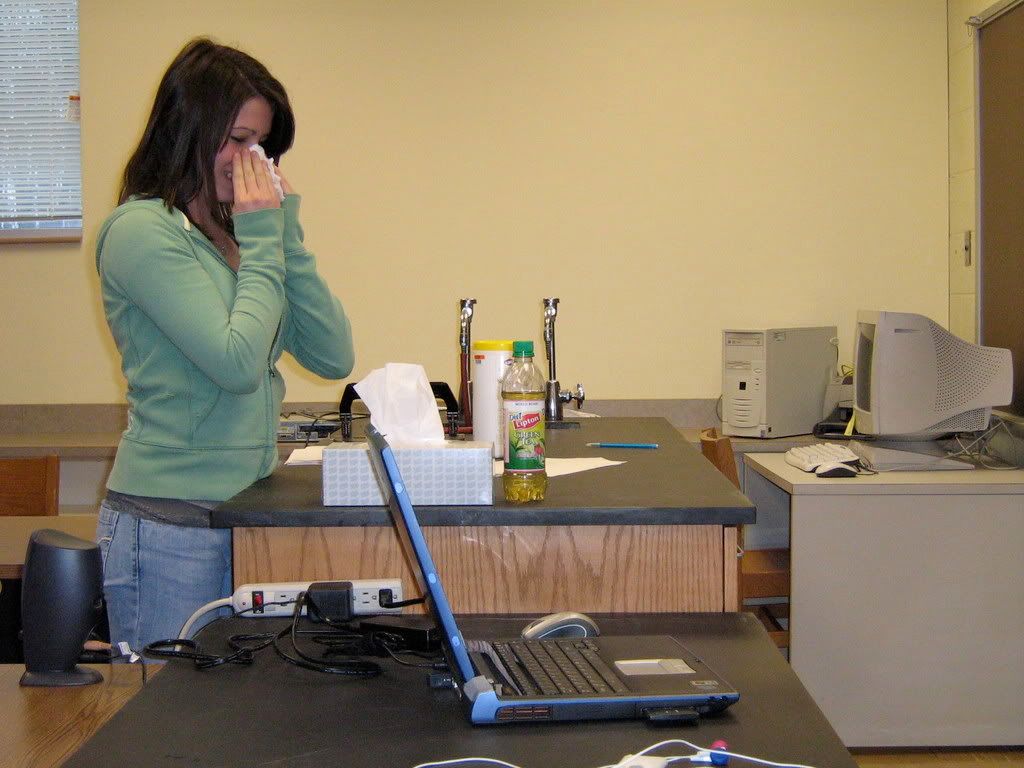
You will need at least two pictures of the same scene with the person you plan to clone appearing in a different location in each photo.
Tip: For best results, set up the camera using a tripod and keep its position and settings fixed for all the photos.
Download source images here:
empty background | girl left | girl right | girl back
Step 1. Using the Free Select Tool (Lasso) roughly select the person you plan to clone in one of the photos in which she appears. Feather the selection by a few pixels, Select > Feather...

The selection needn't be precise. In fact, having some of the surrounding content makes it easier to properly position the pasted layer.
Step 2. Copy the selection,Edit > Copy, then paste it into the background image as a new layer, Edit > Paste as > New Layer.

Step 3. Use the Move Tool (in Layer mode) ...

... to properly position the clone over the background. Zoom in and use some key points to accurately align the clone layer.

Repeat Steps 1-3 to copy, paste, and position the person you are cloning from an image in which she appears in a different place.
Step 1

Step 2

Step 3

You now have a picture in which the same person appears in two different places!
If you have more photos of your person, try placing her in various locations in the scene to get the most interesting results.

The challenge comes when one of your clones is to appear in front of another. In this case, your selection must be precise in the areas where the forward clone layer overlays the rear one. But, you can create a really interesting effect this way.

Imagine and Create!!!
3 comments:
Why copy-pasting?
If you make sure, the camera is fixed on a tripod and not moved between the images you can save a lot of work.
Just put all the images as layers over each other.
- Than make a selection (like you did) around the person on the uppermost layer.
- Choose: add mask (selection)
Maybe you want to blur the selection a bit with the gaussian blur, so there are no seams visible in the final image.
do this for all the layers and you're almost done.
lovely girl. i prefer to use the layer mask and airbrush tool
lovely girl. i prefer to use the layer mask and airbrush tool
Post a Comment