In this easy GIMP exercise you'll combine two images together into a nice, blended single image with two views of the same subject.

Some of the things you will do in this lesson:
- Create a new image of a specific size
- Select and copy an entire image
- Paste a new layer from the clipboard
- Use a layer mask with the Blend Tool
First, grab the two source images by Annika Banfield from stock.xchng:
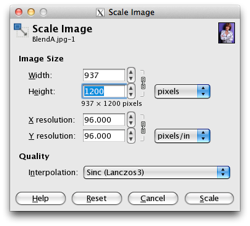
These images will be very large, so the first task is to resize the two images to a smaller easier-to-work-with size, but more importantly, so that both images are the same height, Image > Scale Image… . I resized both to have a height of 1200 pixels,
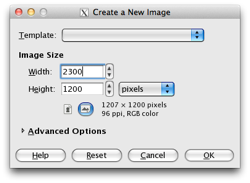
Create a new image, File > New…, with the same height (1200 pixels) and a width approximately equal to the sum of the widths of the two source images (2300 pixels).
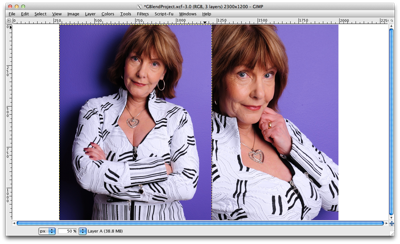
Select all of Image B, Select > All (or Ctrl+A). and copy it, Edit > Copy (Ctrl+C). Paste it onto the new image as a new layer, Edit > Paste as > New Layer. It will appear as a new layer named Clipboard. Rename it as Layer B. Use the Move Tool to position Layer B a bit right of center in the new image.
Repeat this process with Image A, naming this layer Layer A. Position Layer A a bit left of center in the new image, overlapping Layer B.
Add a white (full opacity) layer mask to Layer A, Layer > Mask > Add Layer Mask (or right-click Layer A in the Layers pallet).
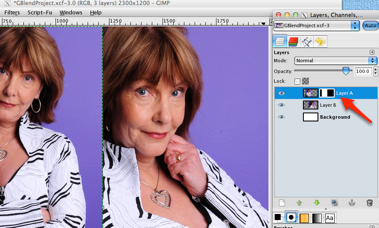
Select the Blend Tool from the Tools pallet, and choose the foreground-to-background (default colors) linear gradient in the Tool settings. Click and drag the cursor horizontally from the right edge of Layer A to gradually fade in the overlapping portion (to about the middle of Layer A).
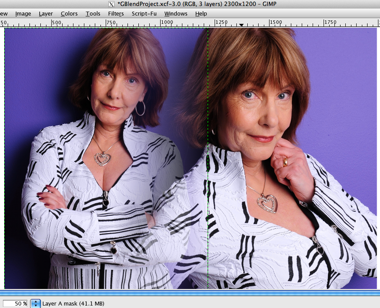
See a video showing how to do this.
Finally, with the Crop Tool, remove the excess background area of the image. You now should have a nicely blended image combining two portraits of the model.
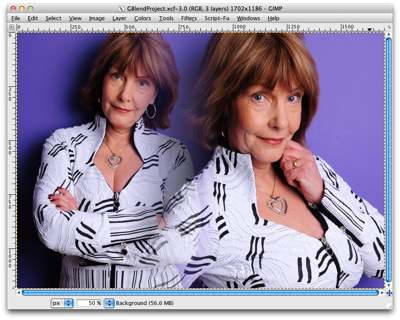
I'm going to apply each of two different effects to Layer A as possible extensions to this project. (Be sure Layer A is the active layer in the Layers pallet before applying any of these effects.)
Desaturate Layer A
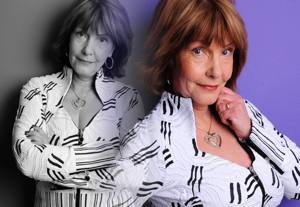
Remove the color from Layer A, Colors > Desaturate.
Blur Layer A
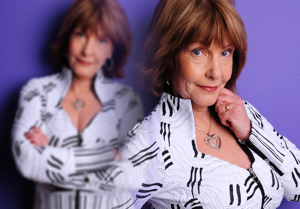
Add a Gaussian blur to Layer A, Filter > Blur > Gaussian…, with a Radius of about 20.
Be bold and creative, experiment with as many effects and filters as you like.

2 comments:
Well I am following all the steps but my gimp does not have a foreground to background option that I can find. I just got it this week so I am a rookie I wish their was something that could help me figure out how to use all this stuff. :(
Look at this:
http://img268.imageshack.us/img268/3056/blendfg2bg.jpg
Post a Comment