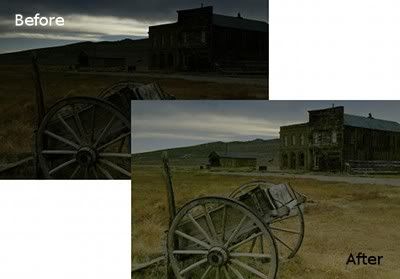
In this short lesson you will learn a quick, easy procedure to use when you need to recover a badly underexposed photograph. A photograph is described as underexposed when there is not enough light in the photo, so it has a loss of shadow detail. This GIMP tutorial is based on a method described by Dave Johnson in PCWorld.
Open the image you want to make a bit more presentable.
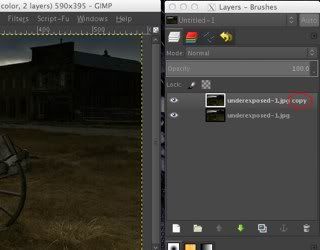
Duplicate the background layer (right-click on the layer and select Duplicate Layer or select Duplicate Layer from the Layer menu) so that there are two identical layers in the Layers pallet.
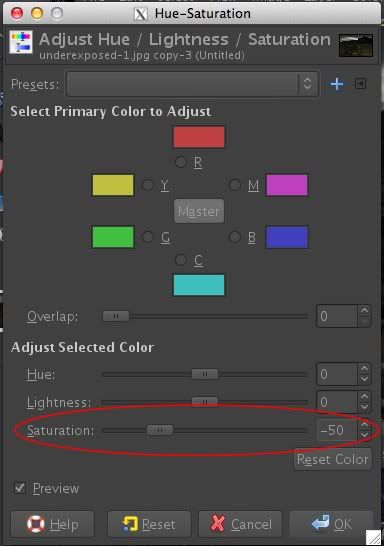
Be certain the duplicate layer, [image name] copy, is the active layer. From the Colors menu select Hue-Saturation... . Slide the Saturation control left to reduce the saturation to -50.
Again from the Colors menu, choose Invert.
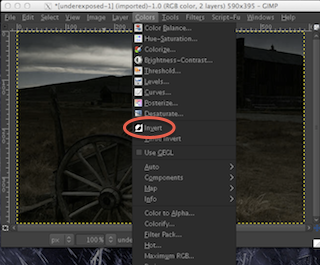
The top layer should now look more or less like the negative of a black-and-white photo.
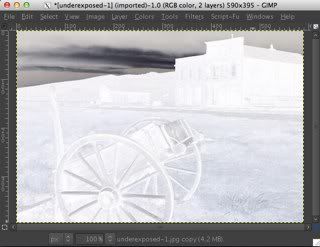
In the Layers pallet, change the Mode of the duplicate layer to Overlay.
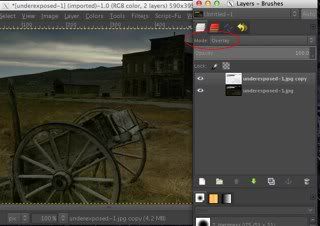
You should now have a somewhat better looking photo than you started with.
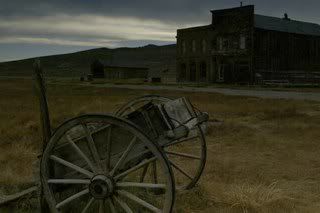
I'm going to flatten the image merging the two layers (Image > Flatten Image), and repeat the entire process once more (saturation reduced to -30 this time) to further enhance the image.
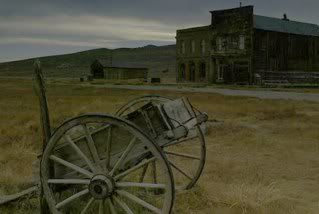
Although this isn't a great fix, it will make an underexposed photo much better for casual use, say for Twitter or Facebook, with very little time and effort.
1 comment:
Great tutorial, thanks!
Post a Comment