Hello Bar

Thursday, March 24, 2011

Rain Dance

In this project you'll learn how add the effect of rain to an image using GIMP.
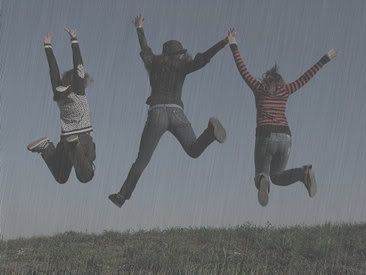
rain-gimp-sml.jpg

In this exercise, you will:

  • Make color adjustments with the Hue-Saturation... dialog
  • Adjustment brightness and contrast
  • Use the noise generator
  • Apply a motion blur

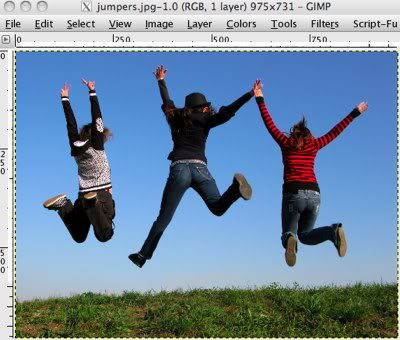
Open the image to which you want to apply the rain effect. You can get the image used in this lesson here. The original photo is by Sanja Gjenero and was downloaded from stock.xchng.
rn01.jpg

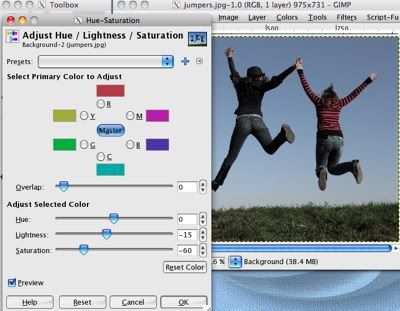
I found it necessary to darken this particular image for a better effect, Colors > Hue-Saturation…, Lightness: -15 Saturation -60. You may or may not need to adjust your image similarly.
rn02.jpg

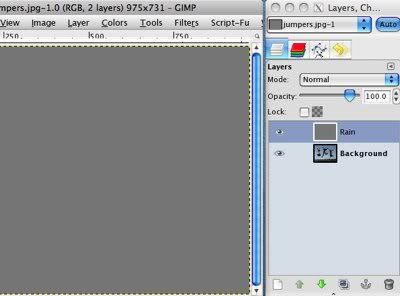
Add a new transparent layer named Rain. Set the foreground color to a medium gray. I used #767676. Fill the Rain layer with the foreground color, Edit > Fill with FG Color.
rn03.jpg

The rain effect is created in four steps:

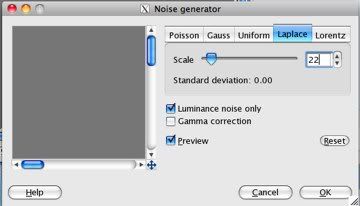
1) Add noise to the Rain layer. Filters > Noise > Noise Generator…, click the Laplace tab and set the Scale to about 22. Luminance noise only should be checked to get grayscale noise rather than color.
rn04.jpg

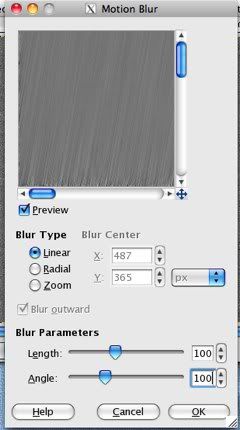
2) Blur the noise. Filters > Blur > Motion Blur…, Blur Type: Linear, Blur Parameters: Length 100, Angle 100.
rn05-1.jpg

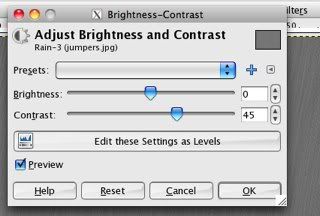
3) Increase the contrast. Colors > Brightness-Contrast…, increase Contrast to about 45.
rn06.jpg

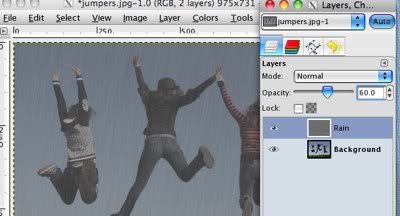
4) Decrease the opacity of the Rain layer. In the Layers pallet, slide the Opacity control left to about 60.
rn07.jpg

There you have it!

rain-gimp.jpg

There's a lot of room for tinkering with these settings to achieve just the effect you want. Go ahead, be a mad scientist, control the weather!

Sunday, March 13, 2011

Snap, Crackle, POP!

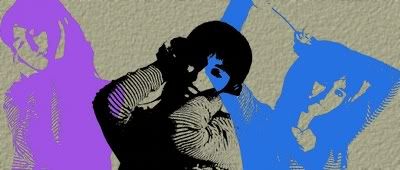
Learn how to easily create a pop art effect in this lesson.

colorgirl-sml.jpg

Some of the things you'll do in this lesson:

  • Use the Threshold tool
  • Select by color
  • Add transparency to an image
  • Use the Colorize tool

Get the source pictures free at stock.xchng or use your own.

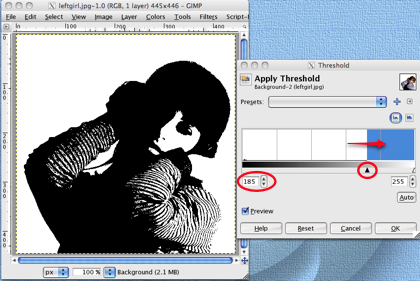
Open the picture of the girl. First, you'll convert the image to hard black and white. Open the Threshold dialog from the menu, Colors > Threshold… . Slide the left (black) marker to the right until the value is 185.

CG01.png

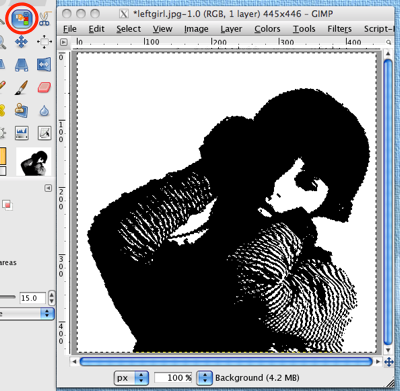
With the Select by Color tool, click anywhere in the white background to select all the white part of the image.

CG02.png

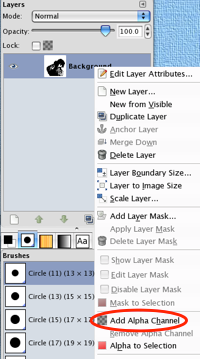
You now need to add transparency to the JPG image. In the Layers pallet, right-click on the Background layer and select Add Alpha Channel from the context menu.

cg03.png

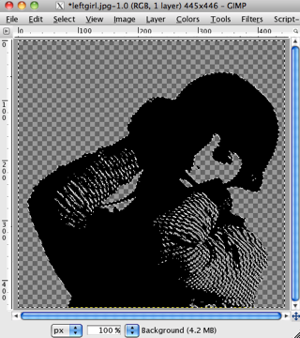
The next step is to replace the white background with transparency. To delete the white area, simply use the Delete key on your keyboard or Edit > Clear.

cg04-1.png

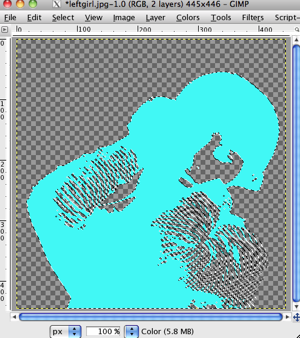
To color the currently black area, add a new layer, Color. Change the FG color to a color of your choice. I used a cyan shade, 00f6f6. Invert the selection to choose the black area, Select > Invert. With the Bucket Fill tool, paint the selection.

cg05.png

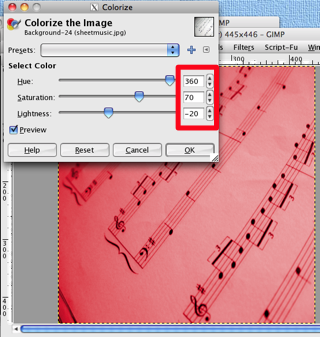
Open the sheet music image and scale it to match the image of the girl, (445x446). Save it. The next step is to add color to the sheet music using the Colorize dialog, Colors > Colorize… . I used these settings: Hue 360, Saturation 70, Lightness -20.

cg06.png

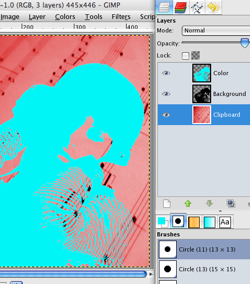
Select the entire sheet music image (Select > All) and copy it. Now paste it into the image of the girl as a new layer, Edit > Paste as > New Layer. The sheet music layer is now the top layer and is named Clipboard. In the Layers pallet, drag the Clipboard layer under all the other layers.

cgo7.png

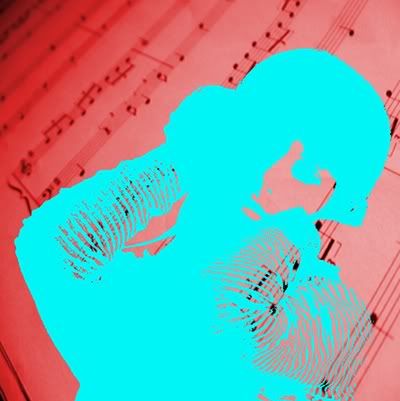
And now you have completed your project!

colorgirl.jpg

There is a lot of opportunity to experiment and play with this project. Try different color combinations and backgrounds. Vary the amount of colorization. Go crazy!

Here's an extension of this project using three different images of the same girl from amminopurr that you might like to try. I put the girls over a clothify-ed, blurred background layer.

BBPgirls.jpg

Saturday, March 12, 2011

Help the Victims of the Japan Earthquake

logo.gif

Your gift to the American Red Cross will support disaster relief efforts to help those affected by the earthquake in Japan and tsunami throughout the Pacific. On those rare occasions when donations exceed American Red Cross expenses for a specific disaster, contributions are used to prepare for and serve victims of other disasters.

Sunday, March 6, 2011

Just Brushing Up

Did you know you can import Adobe® Photoshop® brushes into GIMP 2.4 or higher?

Simply download a brush package from any of numerous websites (myPhotoshopBrushes.com, QBrushes, BrushKing, etc) then unzip it if necessary, to get the .abr file.

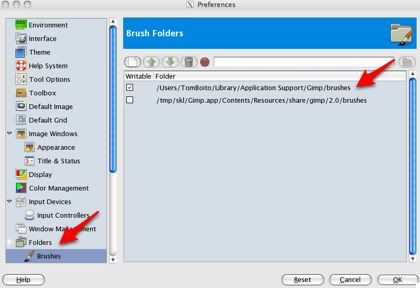
Next you need to find the folder on your hard drive where GIMP stores its brushes. Open the GIMPPreferences pane, Edit > Preferences. Then expand the Folders tab, click on Brushes, and you will see the path to the brushes folder.

Preferences.jpg

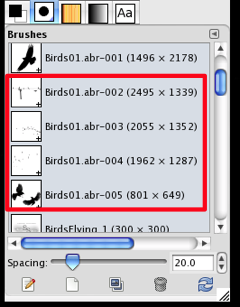
Next navigate to the brushes folder and drag or copy the .abr file into the brushes folder. When next you launch GIMP the new brushes should appear in the brush pallet.

birdbrushes.png

It's as simple as that, but you must be using GIMP 2.4+.