Hello Bar

Wednesday, September 5, 2012

A Framed Painting

A Framed Painting

In this GIMP project, you will learn how to frame a portion of an image and apply a nice painted effect to that portion while turning the remaining part of the image to black-and-white.


Start by opening an image of a picture frame. I used this one by Billy Alexander, from Stock.xchng.

I began by adding an alpha channel to the image so there would be transparency, Layer > Transparency >Add Alpha Channel. Use the Crop Tool to trim away the white area outside the frame. Select the white area inside the frame with the Rectangle Select Tool. Clear the selected area, Edit > Clear. Deselect, Select > None. I scaled the picture frame image to 85% of the base image, Image > Scale Image... . Save the image as Frame.xcf and close the image.


Now open the image that will serve as the base for the project. If you would like to use the same image (by Christa Richert) that I’ll be working with, you can download it free from Stock.xchng.

With the base image active, click Open as Layers... from the File menu, and  open Frame.xcf as a new layer.


The next step is to rotate the Frame.xcf layer a bit. From the Layer menu choose Transform > Arbitrary Rotation..., or choose the Rotate Tool from the Toolbox . Either drag the frame counter-clockwise a bit or enter -10 degrees in the Rotate dialog.


With the Free Select Tool select a rectangle corresponding to the frame smaller than the outside of the frame, but bigger than the inside of it. Make the background layer active.


At this point, apply an oil painting effect to the part of the image inside the frame, Filters > Artistic > Oilify... and set the Mask size to 10. Soften the image just a bit by applying a little blur, Filters > Blur > Blur.


Now, to desaturate the outer part of the image. Invert the selection, Select > Invert. From the Colorsmenu click Desaturate, choose Shade of gray based on Average in the dialog. Deselect.


To finish, we’ll give the frame a shadow. Make Frame.xcf the active layer. From the Filters menu choose Light and Shadows > Drop Shadow... with the default settings.


Most of the settings I used in this example are just suggestions, not hard and fast choices. Adjust the settings that you use to reflect your own tastes and objectives.

Tuesday, August 14, 2012

Blending Two Images - Updated


Blending Two Images with GIMP has been by far the most popular tutorial I have ever posted. However, it is 5 years old and much in need of updating to reflect the many improvements made in GIMP in that time. Following is an updated tutorial using GIMP 2.8.


Select two pictures you want to blend. Choose one to use as the base image and open that one. Name it Base.


Next, you will need to increase the canvas size, Image>Canvas Size..., of this image to accommodate pasting in the other image. In this example, I increased the width of the canvas to 200%, but kept the height the same. In the canvas size dialog, slide the existing image all the way to the left on the canvas. Later you can crop out any unused transparent area.


Open the other image as a new layer in the base image, File>Open As Layers... . Name it Top.


With the Move Tool, position the Top layer so that it overlaps the Base layer an appropriate amount.

Temporarily hide the Top layer by clicking the  in the Layers pallet. Drag a vertical guide out from the ruler on the left to mark the right edge of the Base layer.


Make the Top layer visible again, by clicking the . Add a layer mask to the Top layer. In the Layers palette, right-click the Top layer and select Add Layer Mask…, select White (full opacity).


Be sure the color swatches are set to the default colors. With the Blend Tool paint a FG-to-BG gradient on the layer mask by drawing a horizontal line from the middle to the right edge of the overlapping area.


The two images should now be blended together as shown.


Finish up by flattening the blended images into a single layer, Image>Flatten Image. Use the Crop Tool to remove any unwanted portions of the image.


This is a simple procedure to blend two images. There are many other things you can do to further enhance the image, but those are not the subject of this tutorial.

Thursday, August 9, 2012

Southern Exposure

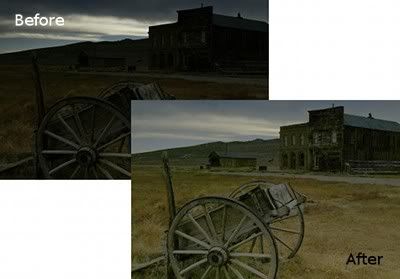
In this short lesson you will learn a quick, easy procedure to use when you need to recover a badly underexposed photograph. A photograph is described as underexposed when there is not enough light in the photo, so it has a loss of shadow detail. This GIMP tutorial is based on a method described by Dave Johnson in PCWorld.

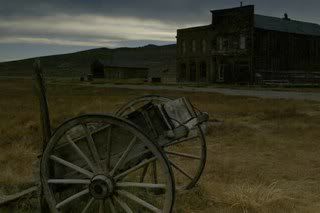
Open the image you want to make a bit more presentable.

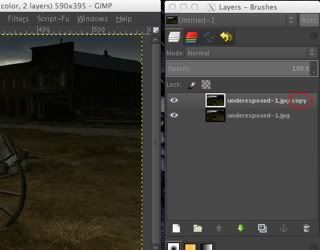
Duplicate the background layer (right-click on the layer and select Duplicate Layer or select Duplicate Layer from the Layer menu) so that there are two identical layers in the Layers pallet.

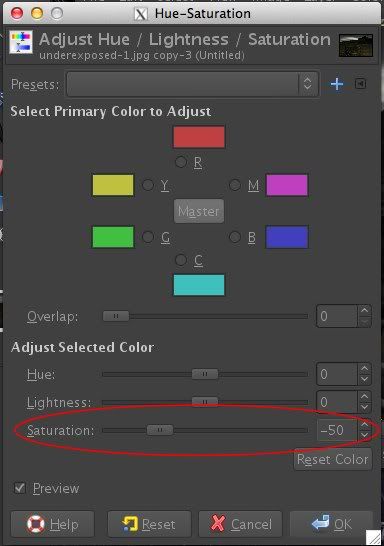
Be certain the duplicate layer, [image name] copy, is the active layer. From the Colors menu select Hue-Saturation... . Slide the Saturation control left to reduce the saturation to -50.

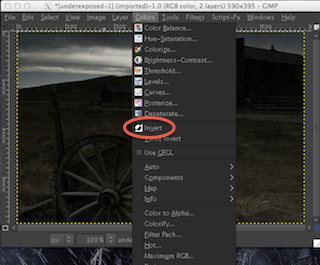
Again from the Colors menu, choose Invert.


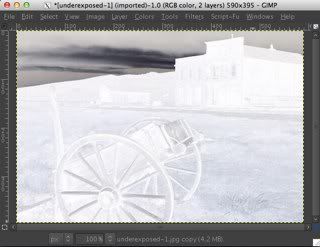
The top layer should now look more or less like the negative of a black-and-white photo.

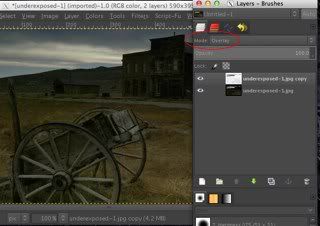
In the Layers pallet, change the Mode of the duplicate layer to Overlay.

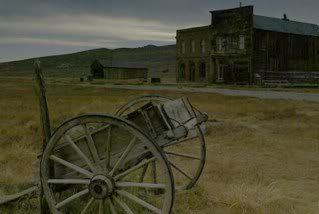
You should now have a somewhat better looking photo than you started with.

I'm going to flatten the image merging the two layers (Image > Flatten Image), and repeat the entire process once more (saturation reduced to -30 this time) to further enhance the image.

Although this isn't a great fix, it will make an underexposed photo much better for casual use, say for Twitter or Facebook, with very little time and effort.