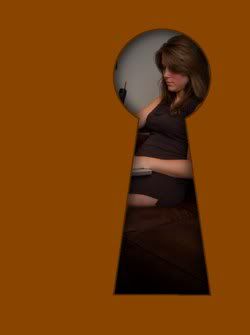
In this GIMP project, you will learn how to use layers, selection tools, the stroke dialog, and filters in creating the effect of looking through a keyhole.
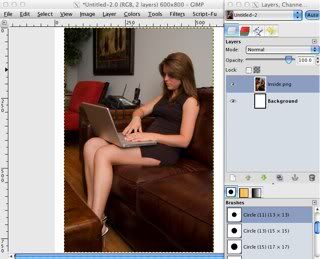
Start by creating a new image 600 pixels wide by 800 pixels high. Open the image that you want to appear through the keyhole as a new layer, File > Open as Layers… . Note: It may be necessary to scale and/or reposition this image to get the best effect.
- Making the keyhole.
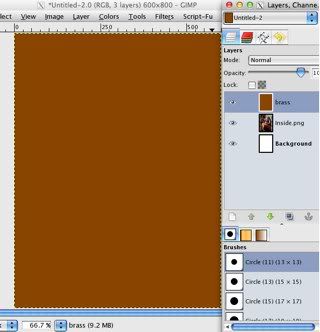
Create a new layer, brass, on top. With the Bucket Fill Tool, fill it with a brass-like color. I used #8a4500.
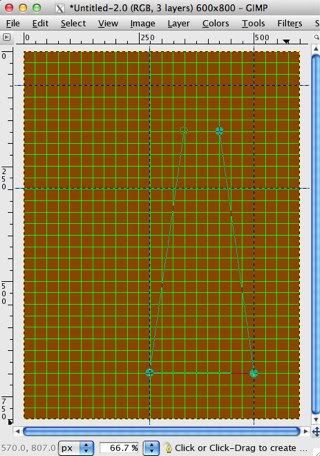
Set gridlines every 25 px in the Preferences panel, Edit > Preferences. In the View menu, turn on Show Grid (the box is checked).
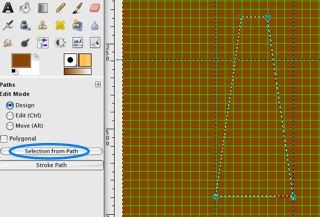
Using the Paths Tool, draw a tall, narrow trapezoid, as shown below, to be the lower part of the keyhole. Suggestion: Dragging out guides can make the selections easier.
Now, in the Tool Options click the Selection from Path button to turn the path into a "marching ants" selection.
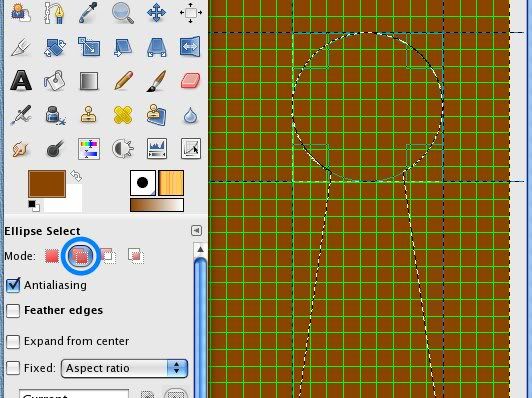
With the Ellipse Select Tool (in Add to the current selection mode) draw a circle to be the top portion of the keyhole as shown below.
Be sure brass is the active layer. Clear the contents of the keyhole-shaped selection, Edit > Clear. In the View menu, turn of the grid and guides.
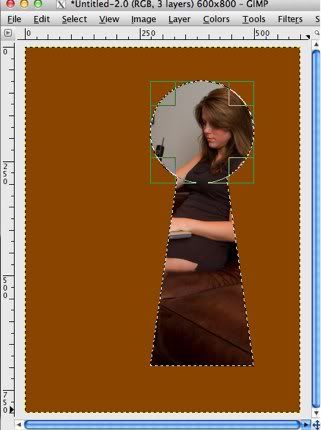
- Putting a slight edge around the keyhole.
Create a new layer named edge on top. Make sure edge is the active layer and stroke the selection, Edit > Stroke Selection…, click the radio button for Stroke with a paint tool, and choose Paintbrush from the drop-down menu. In the Tools pallet, select a paintbrush of about 3 pixels. Set the color to a very dark brown (#532a00). Finally, in the Stroke Selection dialog, click Stroke.
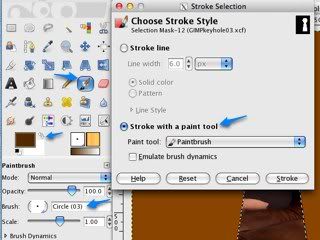
- Put a little bit of shadow inside the edges of the keyhole.
Make a new layer on top, inside shadow. Using Stroke Selection again, chose the Stroke line style, a width of about 15 px, and solid default black, click Stroke. Then, remove the selection, Select > None.
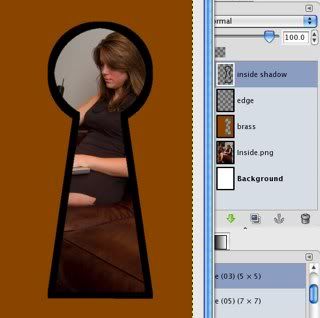
Apply a Gaussian blur with a radius of about 35, Filters > Blur > Gaussian blur… . Drag the inside shadow layer immediately under the brass layer. Decrease the opacity to about 75-80%.
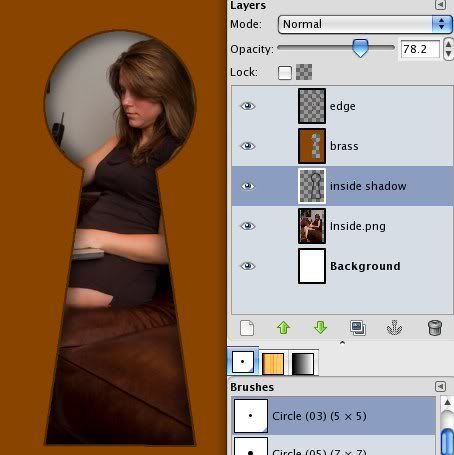
- Add some shadow through the keyhole.
Create a new layer above the inside layer, name it gradient, and fill it with black using the Bucket Fill Tool. Add a layer mask to the gradient layer, right-click the layer in the Layers pallet and select Add Layer Mask… .
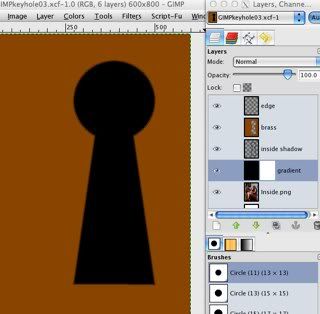
Select the Blend Tool and choose a black-to-white radial gradient. Drag the Blend Tool vertically downwards in the lower portion of the keyhole to reveal the inside layer. You may have to experiment a few times to get a good result. Decrease the opacity to about 75%.
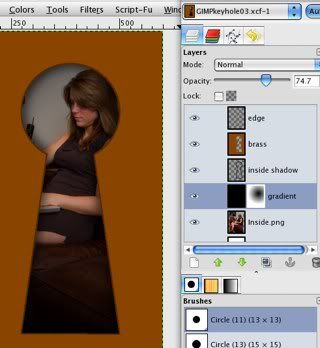
As they say in Montreal, “Voila!” There are numerous opportunities for modifications and variations in this project, so be bold and have fun!

1 comment:
Thanks for sharing this project. Your approach is very helpful - using a few tools in several ways to create a complete project encourages experimentation.
Post a Comment