In this GIMP tutorial you will learn how to place a reflected scene in the mirrored lenses of a girl's sunglasses. This method can be adapted to inset any picture within another picture.
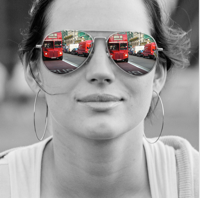
Some of the things you will do in this lesson:
- Duplicate a layer
- Flip an image
- Use the Fuzzy Select tool
- Add an alpha channel
- Scale a layer
- Use a layer mask
You'll need two source images, one of someone wearing sunglasses (best if the subject is looking directly at the camera) and another of the scene you want to reflect in the lenses. Use images of your own or download the ones I used:
Girl in sunglasses by Tanel Teemusk | London bus by Paulo Oliveira Santos
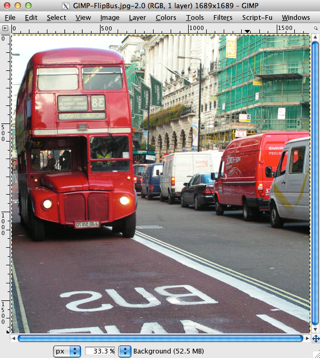
- Begin by opening and preparing the picture of the bus.
Crop the image to include only the essential parts of the picture which you want to appear in the reflection. The proportions of the cropped image should approximate those of the sunglasses' lenses. I cropped to a fixed aspect ratio of 1:1. Because the picture is going to be a reflection, you will need to flip the image horizontally, Image > Transform > Flip Horizontally.
- Now open and prepare the girl in the sunglasses.
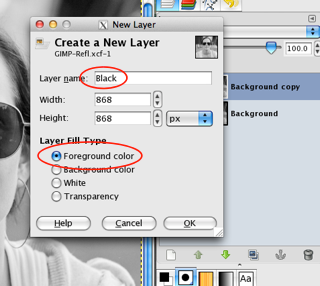
Duplicate the Background layer, Layer > Duplicate Layer. Create a new layer, Black, filled with the foreground color, black, and drag it directly under the Background copy layer.
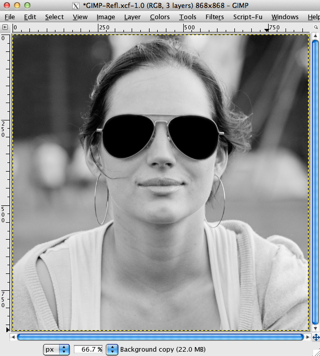
Working on the Background copy layer, you will now select the lens area of the glasses with the Fuzzy Select Tool in "Add to the current selection" mode.
Use Quick Mask (press Shift+Q to toggle Quick Mask) and a soft brush to clean up the selection if necessary.
Feather the selection by about 10 pixels, Select > Feather… . Add transparency to the layer, Layer > Transparency > Add Alpha Channel. Delete the selection, Edit > Clear. Deselect. The lenses should now appear to be filled with solid black, though what you are actually seeing is the Black layer showing through.
- The next task is to fill each lens with the bus picture.
Select all the bus image, Select > All, and then copy it, Edit > Copy. Make the picture of the girl active and paste the copied bus picture as a new layer, Edit > Paste as > New Layer. It will appear as a new layer in the Layers pallet, name it Bus right.

Scale the picture of the bus, Layer > Scale Layer…, to be a little larger than one lens of the sunglasses. In my example, I scaled to 165x165 pixels. With the Move Tool position the bus over the right lens. Now, in the Layers pallet, drag the Bus right layer under the Background copy layer. Adjust the position of the Bus right layer to fill the right lens of the glasses.
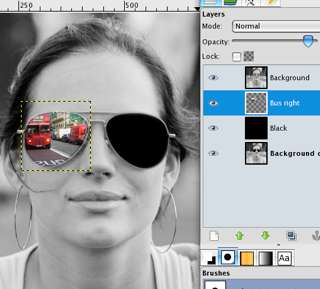
Duplicate the Bus right layer, Layer > Duplicate Layer, name it Bus left. Position this layer under the Background copy layer so it fills the left lens of the glasses.
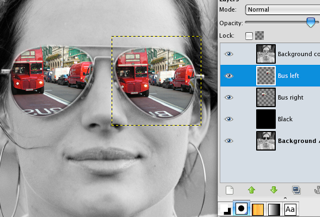
- Now to add a bit of shadow at the bottoms of the lenses.
Select the Bus left layer and add a layer mask to it, Layer > Mask > Add Layer Mask…, initialized to White.
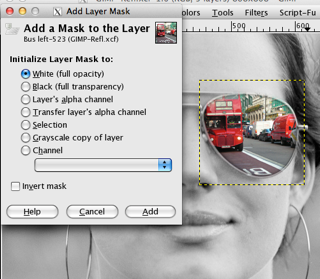
Choose the Blend Tool with a black-to-white gradient selected in the Tool options pallet. Drag a gradient up from the bottom of the Bus left layer to about 1/5 of the lens to add a bit of dark shading to the lower part of the lens. Repeat this for the right lens of the sunglasses.
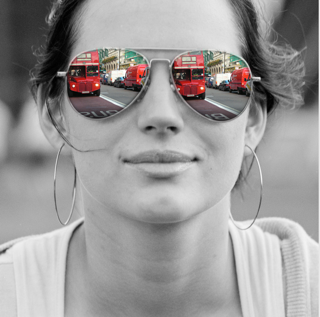
That's it! You might extend the project by brightening the tops of the lenses in a manner similar to that used to darken the bottoms.
